Stamped Concrete Lincoln, NE | C&C Contractors
C&C Contractors | Stamped Concrete Lincoln, NE
EVERYTHING YOU NEED TO KNOW ABOUT THE STAMPED CONCRETE PROCESS
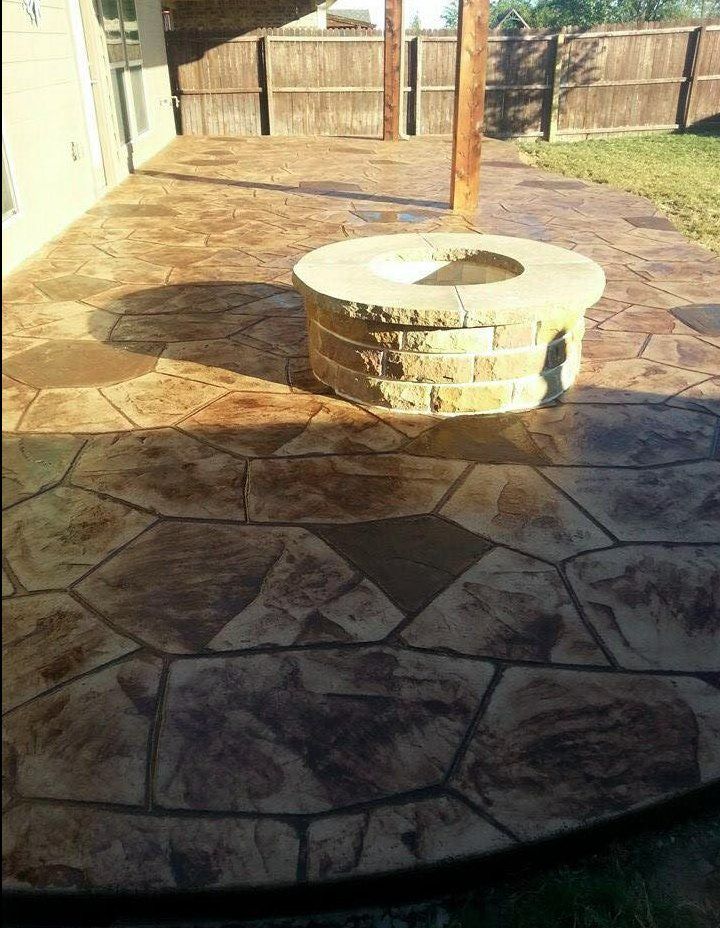
Stamped concrete is a concrete top surface decorated with various patterns, shapes, colors, and so on.
Stamped concrete is very popular in Western countries. It is typically used to decorate the floor in patios, driveways, sidewalks, and car porches.
Stamping concrete adds strength to the floors and gives them a pleasing look.
STAMPED CONCRETE PROCESS
The steps to make stamped concrete are as follows:
1. Preparation of the Base
The first step in the stamped concrete process is to lay a base for the concrete. This entire area is thoroughly cleaned so that no impurities remain on the ground where the concrete is placed.
Then, properly compacting the base with the rammer will increase the base's strength and reduce changes in soil settlement beneath the concrete.
2. Placing Formwork
Place the formwork on the base accurately according to the slab dimensions. Formworks are typically made of wood or plastic.
Check that the forms are properly fixed and will not be lost during the concrete pour.
3. Arrangement for Reinforcement
Reinforcement is essential in any concrete member that is subjected to load, wear, and tear.
Reinforcement in a concrete slab is used to control cracking, provide structural capacity, increase impact resistance, and decrease joint maintenance.
4. Concrete placing and finishing
Concrete is made in two ways: on-site machine mixing or in a ready-mix concrete plant. If the concrete is made on-site, it should be thoroughly mixed in the machine to ensure a homogeneous mix.
When compared to site-mix concrete, the quality of ready-mix concrete is better compared due to the control method used in the plant.
Concrete must be disposed of close to formwork because dumping it from a height causes changes in segregation in the concrete, which is a sign of bad concrete.
Make sure plastic sheeting is used to keep concrete from getting on nearby buildings, landscaping, or other slabs. The type of concrete is also important to successful placement.
When the poring work is complete, the finishing work should begin. Give the top surface of the concrete a proper level and smooth finish.
5. Apply Color Hardener
In the stamped concrete process, the color hardener is applied on the surface as concrete reaches the required plasticity.
The Color hardener is thrown on the concrete's top surface so that it spreads evenly over a large area.
Allow at least 10 minutes for the first layer of color hardener to absorb water from the concrete before applying a float to the surface. As floating is done properly, do the second layer of color hardener and repeat the above steps.
6. Use a Release Agent.
A powered release agent is used in stamped concrete for two reasons: first, it imparts fine-textured color to the concrete surface, and second, it acts as a bond breaker, keeping the stamping mats from sticking to the concrete and causing the texture of the imprint to be disrupted.
A Tampico brush 8 inches wide is recommended to apply a release agent.
7. Check the Concrete Plasticity
Before beginning stamping work, ensuring that the concrete's plasticity has reached the proper stage is critical.
If stamping begins too soon, the concrete may not be strong enough to carry the weight of workers or hold a well-defined imprint.
If you start stamping work too late, it will take more effort and produce little or no texture, especially as you near the end of the job.
8. Begin Placing Stamps on Concrete Surface
We must now begin the stamped concrete process. Place the stamp's form or mold on top of the concrete surface.
After you've placed it, apply the necessary pressure to it so that it imparts its inner shape on the concrete surface. To avoid mismatches, always begin stamping from one side to the other.
9. Apply Curing Compound to the Stamped Surface
Remove excessive dust and release agents from the concrete surface and stamped joints. After that, apply the curing compound to the surface after it has been thoroughly cleaned and allowed to dry.
10. Install Joints
Cutting contraction joints is critical for quickly installing concrete at the proper depth and spacing in the slab.
This joint relieves stress at required locations and prevents uncontrolled random cracking.
We can also begin cutting the joint as the concrete begins to set by a groove, or we can wait until the concrete has set before cutting the joint with a saw equipped with a diamond or abrasive blade.
In the stamped concrete process, a sawed joint is less noticeable than grooving.
11. Final Finishing
Apply a finish coat of sealer to the concrete surface once it has sufficiently cured. After a light surface cleaning, most stamped concrete contractors recommend applying sealer several weeks later.
However, be careful not to apply sealer heavily to the slab, as this could trap moisture. When applying a sealer, it is best to combine spraying and rolling, especially if the stamped pattern has deep grout lines.
Stamped Concrete Contractor in Lincoln and Omaha, NE
Do you want to look into some great options for stamped concrete in your Lincoln or Omaha, NE, home or business? To schedule your free consultation, call C&C Concrete Contractors at (402) 326-5512 today! We can help you choose the best design and materials for your needs.
Get a free quote
Contact Us